 Mobile
 PC
PC
 Full-Cycle
 Co-Development
 Outstaffing
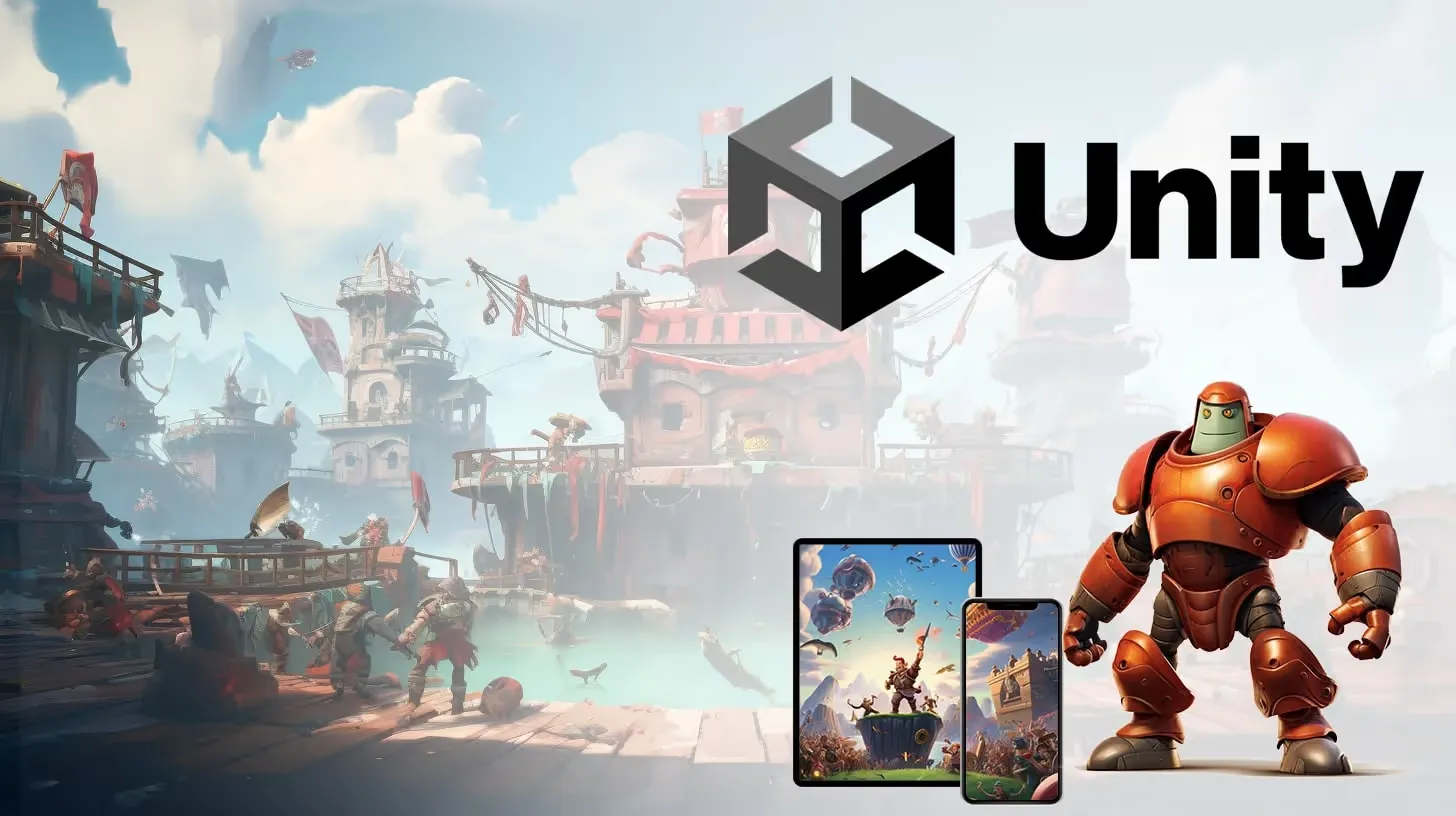
Scalable Unity Game Development Company
Juego Studios is a Unity game development company trusted by 50+ global publishers and studios, including Tencent, Sony, and Disney, to scale, ship, and grow titles. We work across IL2CPP, Addressables, and URP/HDRP pipelines, covering multiplayer systems, LiveOps support, and co-development for mobile, PC, console, and WebGL.
- Home
- Unity Game Development

Juego Studios brings 10+ years of Unity production experience across multiplayer, MMORPG, and action titles on mobile, PC, and console. Our Unity 3D game development company runs sprint-synced delivery through Perforce/Git workflows and milestone reporting. These practices help teams expand capacity, recover delayed builds, and manage multi-platform launches with control.
Full-Spectrum Unity Game Development Services
Unity Multiplayer & Netcode Solutions
We build stable online play through Relay, Photon, lobby flows, matchmaking logic, state replication, lag compensation, and authoritative server models. Our teams engineer smoother sessions, lower disconnect rates, and scalable concurrency for competitive, co-op, and live multiplayer products.

Cross-Platform & Multi-Device Deployment
Ship one Unity codebase across iOS, Android, PC, console, and WebGL with IL2CPP builds, Addressables strategy, input mapping, SDK integration, and certification readiness. Fewer porting delays, cleaner approvals, stronger frame-time control.

Game Art, UI & Animation
We produce Unity-ready characters, environments, UI flows, animation, VFX, and shaders for URP and HDRP pipelines. We check every asset for LOD efficiency, memory budgets, shader cost, and frame impact before it enters production.


AI-Powered QA & Optimization
We reduce launch risk through AI-assisted QA across Unity builds. Our teams automate regression coverage, cluster crash logs, detect GC spikes, and trace memory leaks. This helps studios ship cleaner updates with fewer blockers and stronger release confidence.

Backend Systems & LiveOps
We build PlayFab, Photon, GameLift, progression logic, economy systems, analytics, and content deployment pipelines before launch. Teams gain stable LiveOps, faster updates, measurable retention signals, and stronger post-launch revenue control.

Unity XR & Immersive Experiences
We create production-ready AR, VR, and MR experiences using OpenXR, hand tracking, spatial UI, comfort-tuned locomotion, and strict performance budgets. Our teams deliver polished builds for Quest, Vision Pro, training platforms, and immersive branded experiences.
Engagement Models We Offer
Full-Cycle Unity Game Development
From approved GDDs to launch-ready builds, our full-cycle Unity game development services cover gameplay engineering, CI/CD automation, QA, optimization, and store submission. This approach compresses delivery timelines, reduces rework, and ships stable products across mobile, PC, console, and WebGL.
Unity Co-Development
Extend active production with Unity specialists who plug into your sprint cadence, Perforce or Git repos, and milestone plans immediately. We own gameplay, UI, tools, optimization, and multiplayer modules while your core team maintains roadmap control.
Unity Team Augmentation
Add senior Unity engineers, technical artists, QA leads, and producers who contribute to live workflows from day one. Juego Studios expands execution bandwidth, protects sprint velocity, and removes hiring lag during milestone-critical phases.
About US

10+
Years in Market

50+
Clients

200+
Projects

250+
Team
One of the Most Trusted Game Development Studios

Well, I signed up to work with Juego Studio for a project and they really exceeded my expectations. The project was delivered on time, with no hiccups whatsoever. They are talented and professional game developers who get the job done without fail. I cannot recommend them enough!
Sam Anthony Gilfred
Sr. Project Manager
Amazon

I was very pleased with the quality of the work we received for our project. They were delivered on time and with very minimal feedback from our team. Juego Studios is good company to work and will be looking to them for our future projects!
Paul Skinner
Director
Wicked Witch Studios

It's safe to say that most regular human beings would be shocked and daunted at the idea of having to do a high quality game for iOS and Android, within a deadline of few months. I can honestly say that this work not the case with Juego Studios. They responded reactively, calmly and productively, and ended up delivering a game that both myself, the LatAm team, and users, were very happy with. There is a calm and experienced professionalism to the Juego team, and I would not hesitate to use them again.
Josh Saunders
Senior Director,
Innovation (Warner- Group)

The Juego Studios team was instrumental in developing one of our recent apps. We were able to supplement our small development team with several more developers that worked on front and backend features. They filled gaps wherever necessary and accelerated our time to market. After release, they continued to help us with new features and bug fixes. I would work again with them if needed.
Robert Baily
Director of Application Programming
JumpStart Games
Recent Projects We Have Completed
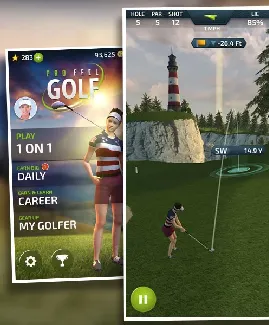
PRO FEEL GOLF
A SIMPLE AND ADDICTIVE GOLF GAME
PRO FEEL GOLF
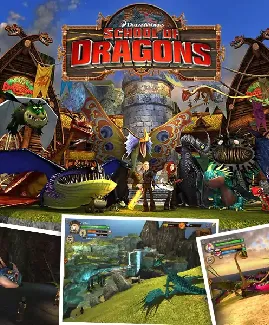
SCHOOL OF DRAGONS
A MOBILE RPG GAME BASED ON A FAMOUS MOVIE FRANCHISE
SCHOOL OF DRAGONS
Why Teams Choose Juego for Unity Projects

Full IP Control
Every deliverable is built to your coding standards, stored in your Perforce or Git environment, and documented for internal continuity. You retain complete ownership of code, assets, and systems after handoff, without vendor lock-in.
Scalable Team Size
Production demand shifts between prototype, production, polish, and launch phases. Our 250+ Bengaluru-based Unity team scales up during crunch and back during lighter cycles, with IST overlap for US and EU hours, without restarting contracts, losing context, or disrupting sprint momentum.
Pipeline Stability
Unity upgrades, package conflicts, and broken builds can halt production unexpectedly. Our teams manage LTS migration paths, branch hygiene, package validation, and CI build health to keep releases stable during active development.
No Ramp-Up Tax
External teams often take weeks to become useful in a live production. Structured onboarding built around your GDD and sprint backlog cuts that gap — the team operates inside your workflow, not alongside it.
Advanced VFX & Shader Solutions
Our Unity 3D developers bring senior rendering expertise across the URP and HDRP pipelines. We optimize shaders, VFX, materials, lighting, and draw-call cost early to protect frame budgets and visual quality.
First-Pass Launch Readiness
Late certification failures waste release windows and budget. We prepare builds early for App Store, Google Play, Steam, PlayStation, and Xbox requirements, reducing rejection cycles and keeping launch dates on track.
Our Case Studies
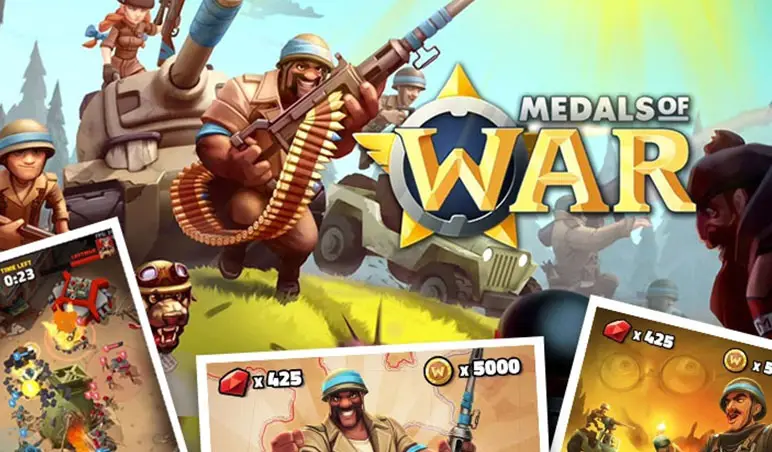
Medals of War
Medals of War is a strategy game with a military theme where players command their own armies. Using various troop types, they compete against one another in intense PvP battles, strategizing to outmaneuver and defeat their opponents.
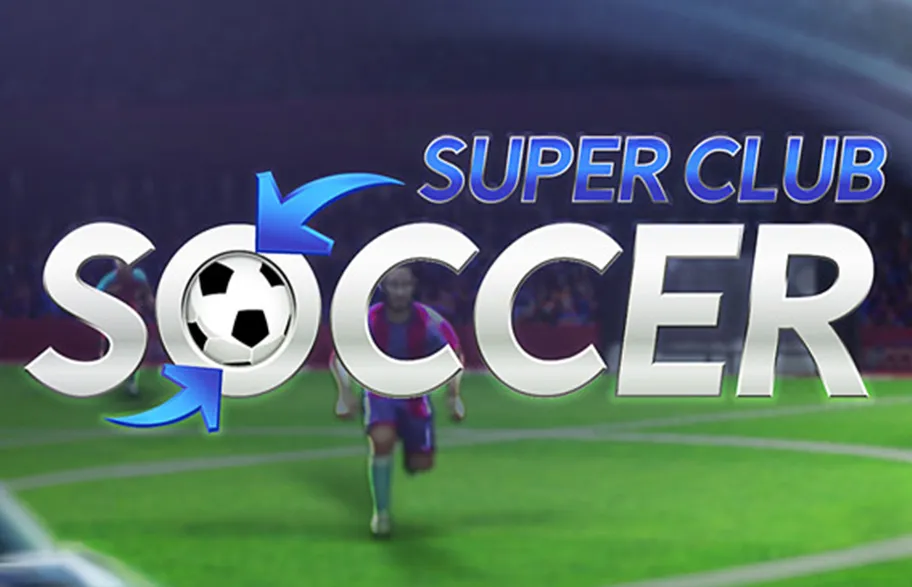
Super Club Soccer
Super Club Soccer (SCS) is a soccer game with turn-based, strategic gameplay mechanics. It also features club and player management features, multiplayer gameplay options, and an intelligent in-game AI.
The Process We Follow for Unity Game Development
Scope & Discovery
We audit the GDD, feature scope, platform targets, and delivery risks before production starts. We clarify milestones, dependencies, and budget exposure early. This prevents scope drift, rushed pivots, and expensive mid-project resets.
Technical Foundations
Our custom Unity game development services begin with repository setup, CI/CD, Unity version locking, package validation, and prototype stress tests. We surface architecture issues before team scale-up. This protects timelines from rebuilds and unstable production pipelines.
Art Pipeline Control
We approve URP/HDRP standards, shader rules, LOD targets, and memory budgets before asset volume ramps. This avoids costly rework when content fails integration, visual consistency, or performance checks near milestone deadlines.
Sprint Build Delivery
Every sprint ends with a playable Unity build, clear acceptance checks, and blocker review. Stakeholders see measurable progress early, while the team resolves issues before they accumulate into late-stage delivery delays.
QA & Optimization
Functional QA, regression coverage, device testing, frame-time profiling, memory tracking, and crash review all run before release planning. We fix problems at this stage at a fraction of post-launch cost, protecting launch quality, ratings, and submission schedules.
LiveOps & Growth
Post-launch operations run through content calendars, telemetry reviews, economy tuning, and scheduled update cycles. Player data guides each release, protecting retention, revenue momentum, and live-service stability after launch.
Talk to a Unity Expert Today
Frequently Asked Questions
Unity remains one of the strongest engines for cross-platform game production because it balances rapid iteration, scalable architecture, and deployment flexibility without slowing down production pipelines. We typically recommend Unity for mobile-first games, LiveOps-driven products, multiplayer experiences, and projects that need simultaneous deployment across platforms.
For studios working against aggressive launch windows, Unity’s tooling ecosystem helps reduce production friction through reusable systems, faster prototyping, and streamlined content updates. It also supports modern workflows around AR/VR, analytics, backend integration, and real-time optimization, making it practical for both indie productions and large-scale commercial titles.
Unity 3D game development typically takes 3–6 months for smaller mobile games, 12–18 months for mid-scale multiplayer or cross-platform titles, and longer for live-service or AAA-scope productions.
Timelines depend on scope, platform count, multiplayer complexity, art volume, and how clearly requirements are defined before production starts. Juego Studios has delivered functional mobile builds in under 6 months for clients with well-scoped GDDs and stable milestone plans.
Our Unity 3D game development services cover full-cycle development, multiplayer and backend integration, cross-platform porting, AR/VR/XR, gameplay engineering, technical art and animation, performance optimization, and QA through post-launch LiveOps support. The value comes from handling the operational complexity around shipping, scaling, and maintaining a game successfully, not gameplay programming alone.
Most Unity engagements typically include:
- Full-cycle game development from concept to launch
- Multiplayer systems and backend integration
- Cross-platform porting for mobile, PC, and console
- AR/VR/XR development
- Gameplay engineering and progression systems
- Technical art, animation, VFX, and environment production
- Optimization for frame rate, memory, and device stability
- QA, certification readiness, and post-launch LiveOps
Our teams also integrate directly into existing production pipelines using Jira, Slack, Git, and Perforce. This integration becomes critical in co-development environments where milestone visibility and sprint velocity matter as much as engineering output.
We optimize through continuous memory management and garbage collection reduction, CPU/GPU profiling, adaptive quality settings across device tiers, draw-call and shader/texture optimization, asset streaming, and device-specific QA across Android and iOS — applied throughout development rather than as late-stage cleanup. Performance problems become significantly harder to solve once gameplay systems, assets, and rendering pipelines are already deeply integrated into production, which is why this work starts early.
Our optimization workflows typically focus on:
- Memory management and garbage collection reduction
- CPU/GPU profiling and bottleneck analysis
- Adaptive quality settings across device tiers
- Draw call, shader, and texture optimization
- Asset streaming and Addressables management
- Battery and thermal performance stabilization
- Network optimization for multiplayer systems
- Device-specific QA validation across Android and iOS ecosystems
The goal is maintaining stable framerate, responsiveness, and gameplay consistency across both flagship and lower-tier devices without compromising visual quality or retention experience.
A Unity game development service is typically the right fit for studios and businesses that need scalable production across multiple platforms without maintaining separate development pipelines for each device ecosystem.
We usually see Unity used by:
- Startups building MVPs before scaling internal teams
- Publishers expanding LiveOps or multiplayer titles
- Indie studios targeting mobile and PC simultaneously
- Enterprises creating gamified training or simulation products
- Teams building AR/VR or real-time 3D experiences
Unity works especially well when production speed, platform flexibility, and ongoing content delivery are priorities. For many teams, the ability to iterate quickly while maintaining a shared gameplay architecture is what makes the engine commercially practical.
Unity game development in India typically costs $15,000–$80,000 for smaller mobile games and $100,000–$300,000+ for multiplayer, cross-platform, or content-heavy productions.
India-based studios like Juego Studios support Unity projects across mobile, PC, console, and XR. Teams operate with sprint-based delivery, Git or Perforce workflows, milestone reporting, and scalable structures. The advantage is not just lower cost; it’s structured production that integrates directly with global studio pipelines.
Yes, but the level of redevelopment usually depends on how the project architecture was planned early in production. Unity supports both 2D and 3D pipelines within the same engine, which gives teams flexibility during prototyping, visual evolution, or gameplay restructuring phases.
The biggest challenges typically appear when gameplay systems, camera logic, animation pipelines, UI layouts, or asset structures were built too tightly around one production style from the beginning. Projects designed with modular systems, scalable architecture, and flexible asset workflows can usually transition between 2D and 3D far more efficiently without forcing major engineering rework later in development.
The right partner is the one whose proven track record matches your project’s scope and risk tolerance, not the one with the best pitch. Check six things to confirm fit: platform and performance range, gaps they’d actually fill (engineering, art, LiveOps), total lifecycle cost, LiveOps readiness, the ownership model—full-cycle, co-development, or augmentation, and whether they can grow with you long-term. Juego Studios builds every engagement around full IP transfer, sprint visibility, and milestone delivery to match these checks.
Unity production is increasingly moving toward scalable, service-driven, and cross-platform ecosystems rather than isolated standalone game builds. Studios are prioritizing production flexibility, retention systems, and long-term content scalability much earlier in development.
Key trends shaping Unity development today include:
- Cross-platform production across mobile, PC, console, and XR
- LiveOps-first architecture and continuous content delivery
- Multiplayer infrastructure and backend service integration
- AI-assisted workflows for production acceleration
- Performance optimization for low- and mid-tier mobile devices
- Cloud-based collaboration and distributed production pipelines
- Data-driven progression balancing and retention optimization
- Hybrid monetization systems combining ads, battle passes, and IAPs
Studios are also placing greater emphasis on scalable architecture and production maintainability so games can evolve continuously after launch without destabilizing existing systems.
The biggest challenges are performance inconsistency across device tiers, memory spikes, GPU/CPU bottlenecks, battery drain, and store certification failures — and we overcome them through structured optimization pipelines, profiling workflows, adaptive quality systems, and device-tier testing run throughout production rather than left to late-stage stabilization.
The most common deployment challenges include:
- Performance inconsistency across Android device tiers
- Memory spikes and crash instability
- GPU and CPU bottlenecks during gameplay
- Battery drain and thermal throttling
- Device-specific rendering and UI issues
- Store certification and compliance failures
- Network instability in multiplayer environments
- Large build sizes affecting installs and retention
We address these through structured optimization pipelines, profiling workflows, adaptive quality systems, and device-tier testing. Memory management, automated QA validation, and platform-specific deployment checks run throughout production rather than waiting until late-stage stabilization.
A Unity 3D game development company helps build, optimize, and ship games using Unity. This can include gameplay engineering, art integration, multiplayer systems, backend setup, QA, performance optimization, and LiveOps support.
Studios like Juego Studios can handle full-cycle Unity development or plug into an existing production pipeline as a co-development team. The engagement depends on the project’s stage. It ranges from complete ownership of the build to adding Unity specialists for a specific milestone.
Hiring a Unity game development company in India gives studios access to experienced Unity engineers, cost-efficient production, English-speaking teams, and strong overlap with US and European workflows.
India-based studios like Juego Studios support Unity projects across mobile, PC, console, and XR. Teams operate with sprint-based delivery, Git or Perforce workflows, milestone reporting, and scalable structures. The advantage is not just lower cost; it’s structured production that integrates directly with global studio pipelines.
A top Unity studio is defined by production-ready execution, not Unity usage alone. That shows up as: real shipping experience under pressure, not just prototyping; clear ownership across the delivery lifecycle; cross-platform maturity across mobile, PC, console, and XR; LiveOps built into delivery rather than bolted on afterward; team scalability as scope shifts; and a track record of shipped titles. Juego Studios holds itself to these same six criteria.
Partnering and outsourcing offer different benefits depending on how much control you want to keep. Partnering suits long-running projects. You retain strategic direction while transferring execution, with continuity through launch and post-launch. Outsourcing suits scoped work, which means fast capacity without long-term commitment, risk limited to defined deliverables, and resources that scale up or down freely. Juego Studios runs both models.
Three models cover most Unity engagements: managed outsourcing with a clearly defined scope for well-specified builds, co-development for evolving or LiveOps-heavy projects that need shared ownership as requirements shift, and dedicated team/outstaffing at roughly $4,000–$8,000 per developer per month for ongoing capacity. Full-cycle studios often blend models to balance cost control with flexibility. Juego Studios scopes the model to match your project stage.